Security Link™
This feature is not available on all diagnostic tools.
To protect vehicle communication networks from unauthorized access, OEM’s are implementing secure gateway modules that only allow authorized users to access certain diagnostic functions using an approved diagnostic tool.
To use Security Link you will need a compatible Snap-on diagnostic tool, and create an account as well as a Snap-on profile.
For more information on how to setup these accounts and get authorized:
Visit - https://www.snapon.com/securitylink/au-en
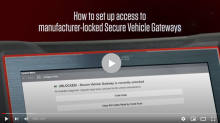
Watch the "How to..." video in this link for an overview on how to setup your FCA OEM account (the link opens in new browser tab). The video was created for the UK market, however the general procedures can be used for the AU/NZ markets. Disregard the URL references with the "UK-EN" extension, and substitute "AU-EN" as applicable.
Currently Security Link is only compatible with Fiat Chrysler Automobiles (FCA) 2018+ models. For additional reference and future coverage see https://www.snapon.com/securitylink/au-en
Getting Set Up (steps)
Getting Set Up
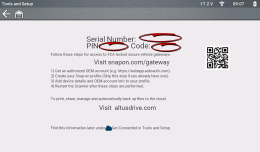
 Step 1 - Get your diagnostic tool information
If you have not already linked your diagnostic tool to your Snap-on Profile Manager account, proceed to the next step. If you have, proceed to "Create an AUTOAUTH Account below".
|
1.
|
Connect your compatible diagnostic tool to Wi-Fi (as market applicable: TRITON D-10 and D-8, APOLLO D-9 and D-8, P1000, MODIS Ultra, MODIS Edge, SOLUS Edge, ETHOS Edge, and tools released after 2021). |
|
2.
|
Select the Tools icon  from the Home screen. from the Home screen. |
|
4.
|
Remember the following information from this screen:
|
 Step 2 - Create an FCA account
The FCA account requires payment.
|
2.
|
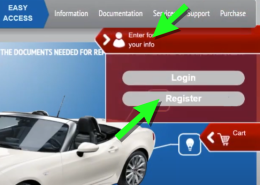
Follow the screen prompts to register, starting with Accept the Terms and Conditions. |
|
3.
|
On the Technical Information Registration screen, enter your VAT-ID number. If you are a first time user then select NEW. |
|
4.
|
If needed, enter your company information as required including your VAT-ID (Value Added Tax Identification Number ). Attach (Attach File button) the required VAT documents as evidence of your VAT numbers and operation in the automotive sector. |
|
5.
|
Enter all registration information as required including your actual business location and billing address. Select Save as required and follow the screen prompts to continue. |
|
6.
|
Complete the security question section. |
|
7.
|
Select your Type of Business and then select Save to compete the registration. You will be sent a confirmation email with your "first time" user ID and password. |
|
8.
|
Open the email sent to the address you used to register and note the generated "first time" user ID and password. This email may take up to ten days to arrive. |
|
9.
|
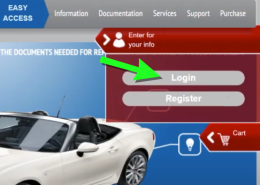
After you receive your "first time" user ID and password, return to technicalinformation.fiat.com select Login (to be redirected to the FCA website). |
|
10.
|
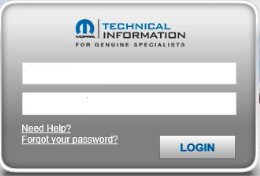
On the FCA website, enter your "first time" user ID and password. |
|
11.
|
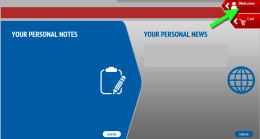
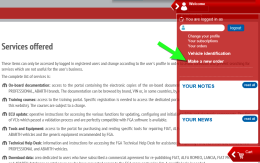
On the main page click on the profile icon to access the menu. |
|
12.
|
Select "Make a new order", this allows you to setup your desired diagnostic tool access subscription. |
|
13.
|
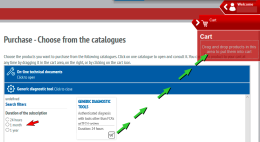
Select the “Generic diagnostic tool” tab and then choose the subscription time period (e.g. 24 Hr, 1 mth, 1 yr. etc) and then drag/drop your selection into your shopping cart. |
|
14.
|
Confirm your purchase and make the required payment. |
|
15.
|
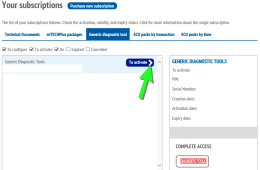
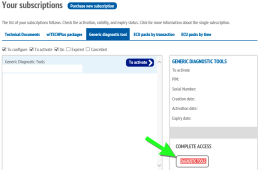
After the payment has processed, you need to activate your subscription. Click on your profile icon (like before) to access the main menu, and select “Your subscriptions”, then select the “Generic
diagnostic
tool” tab and click
the arrow on the “To activate” button to activate it. |
|
16.
|
Confirm your activation information on the screen, then click the "Diagnostic Tools" button. |
|
17.
|
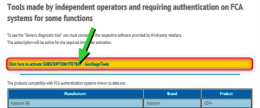
To complete the activation, click the yellow button "Click here to activate...." on the activation screen. |
Your FCA account is now active.
 Step 3 - Adding your AutoAuth Credentials to your Snap-on Profile Manager
If you do not have a Snap-on Profile Manager account, you need to create one first, see New User - Create an Individual Account
If you are already using the , you already have a Snap-on Profile Manager account.
|
1.
|
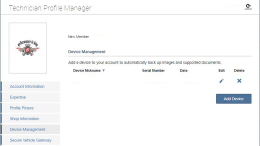
If you already have a Snap-on Profile Manager account, log in and select the
Device Management tab.
|
|
2.
|
(If you have not already linked your diagnostic tool to your Snap-on Profile Manager account perform this step, if you have, then proceed to the next step.) Enter your Diagnostic Tool Pin Code and Serial Number
from the Get Connected screen of your tool
(See "Step 1 - Get your diagnostic tool information" at the beginning of these instructions). |
|
3.
|
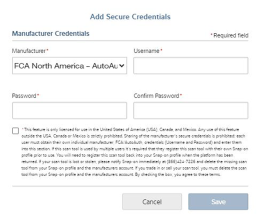
Select the Security Link tab, then
select Add Secure Credentials.
|
|
4.
|
Enter your AutoAuth account username and
password and select Save. |
|
5.
|
Your diagnostic tool is now linked to your
AutoAuth account which allows you to connect and access the applicable secured gateways during scanner use.
|
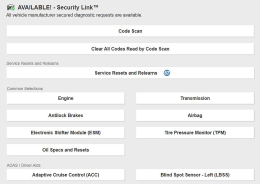
Typical Diagnostic Tool Image Showing Security Link is Available
Registering Your Diagnostic Tool for Warranty

